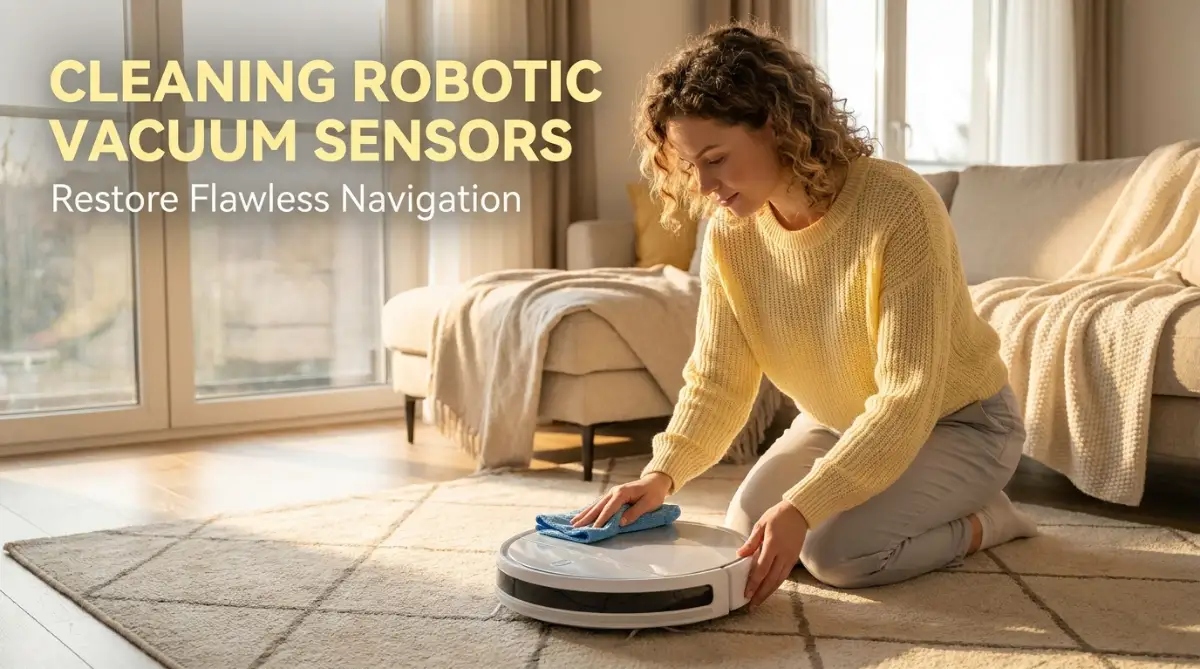
The Frustrating Dance of a Confused Cleaning Bot
I remember staring at my favorite robotic vacuum as it repeatedly slammed its plastic bumper into my living room couch. I had spent a good amount of my hard-earned money on this smart device to save time. Instead, I found myself babysitting a confused machine that spun in endless circles.
My cat was terrified, my floors were still dirty, and my stress levels were completely through the roof. I actually thought the internal motor was entirely broken. Then, I realized the real issue was just a thin, invisible layer of household dust blinding its expensive navigation system.
When you buy a premium automated cleaner, you are buying the promise of ultimate peace of mind. You expect to press a button on your phone, walk out the door, and return to spotless floors. But when that expensive machine gets stuck in the middle of an empty room, that promise is completely shattered.
It feels incredibly unfair. You are forced to grab a traditional broom and manually sweep the house while your robotic helper flashes a flashing red error light on its charging dock.
The mental load of managing a failing smart device is exhausting. You start treating the vacuum like a fragile toddler, constantly moving chairs and hiding rugs just to help it survive a single cleaning cycle. This constant supervision completely defeats the purpose of owning an automatic appliance.
Many people give up and throw their devices into a dark closet, assuming the technology is just flawed. However, the hardware is usually perfectly fine. The real problem is simply a lack of proper hygiene for the tiny, sensitive electronic eyes that guide the machine.
Decoding the Invisible Eyes of Your Smart Machine
To fix the navigation issues, you first need to understand how your automated helper actually sees the world. These devices do not have cameras like a smartphone. Instead, they rely on a complex network of invisible light beams.
Think of your vacuum like a tiny, rolling lighthouse. It constantly shoots invisible infrared light out into your room. When that light hits a wall, a chair leg, or a staircase, it bounces back to the machine.
The computer inside the vacuum measures exactly how long it takes for the light to return. This mathematical calculation tells the robot exactly how far away an obstacle is. This technology is pure physics in action, and it requires complete visual clarity to work correctly.
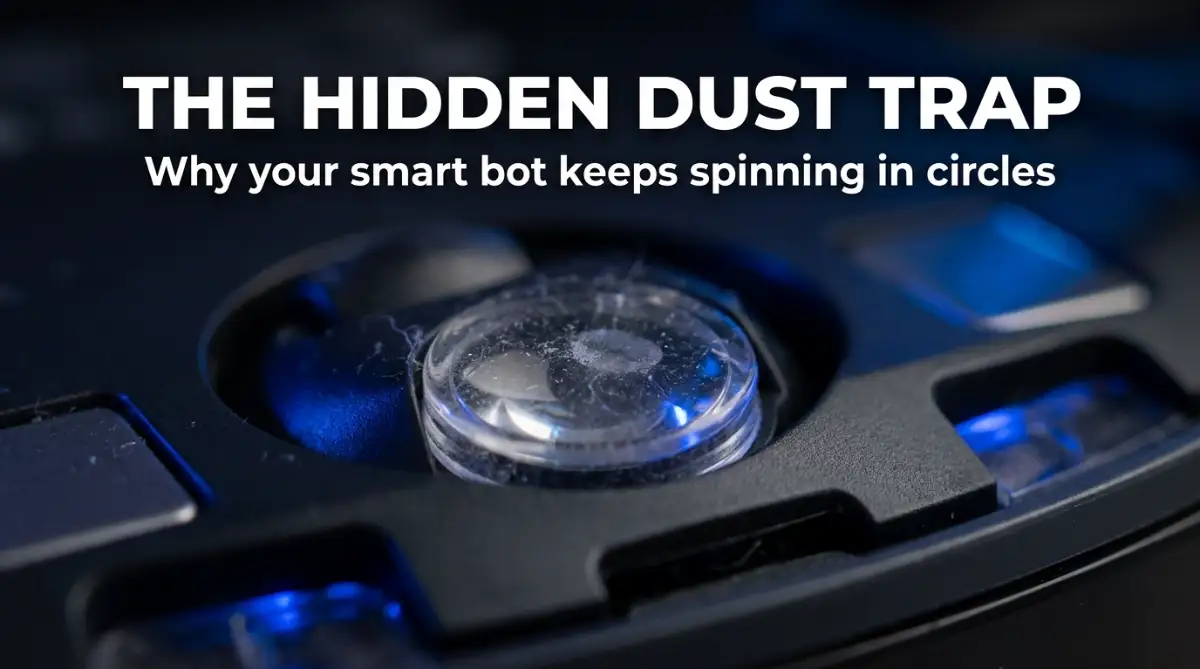
If a layer of thick pet dander or sticky cooking grease covers the plastic lens, the light cannot escape. The light gets trapped inside the housing, bouncing back immediately. The vacuum's brain gets confused, thinking it is trapped inside a tiny box, causing it to spin wildly or shut down.
Assembling Your Precision Maintenance Toolkit
You cannot just grab a wet paper towel from the kitchen and start scrubbing these delicate electronics. Using the wrong materials will permanently scratch the plastic covers, ruining the navigation system forever.
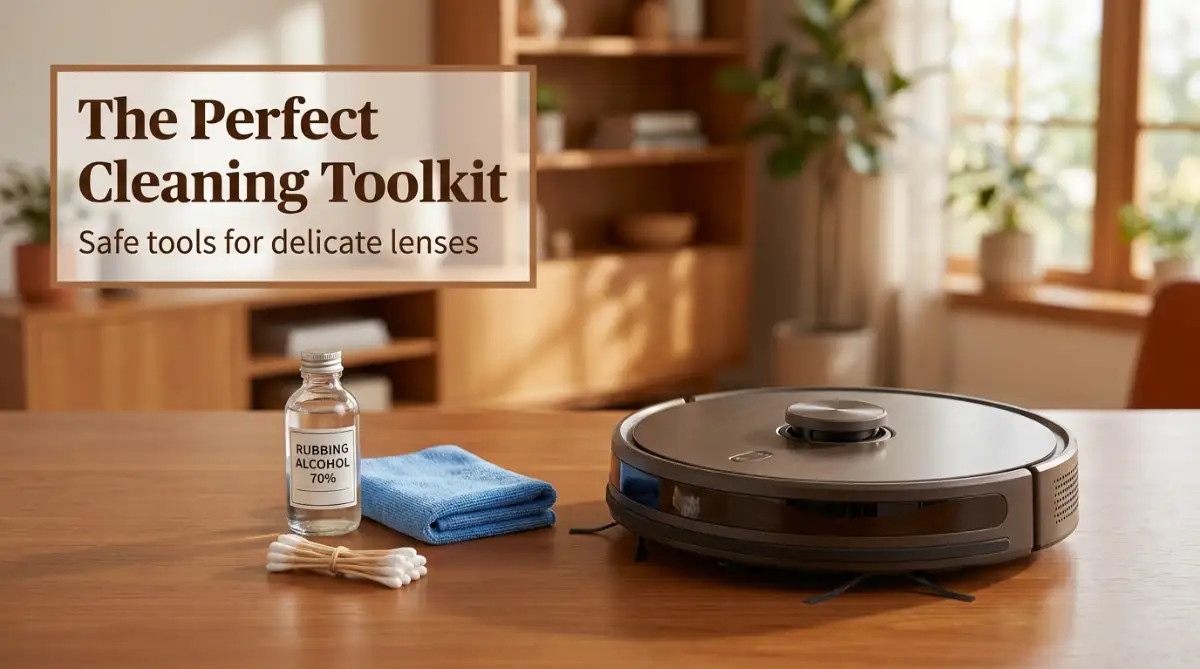
You need to gather a few specific, household items to do this safely. Your first essential tool is a high-quality microfiber cloth. Microfiber is engineered with thousands of tiny, split fibers that physically trap dust particles instead of just pushing them around.
Next, you need a small bottle of isopropyl rubbing alcohol (preferably 70% or higher). You also need a handful of regular cotton swabs. Finally, a can of compressed air is highly recommended for reaching the deepest, narrowest gaps.
Why do we use rubbing alcohol instead of normal tap water? Water contains heavy minerals that dry slowly and leave a cloudy residue on plastic. Rubbing alcohol evaporates almost instantly, leaving behind a perfectly streak-free, crystal-clear surface for the infrared lasers.
Tackling the Notorious Underside Cliff Sensors
The most common reason your device refuses to move forward is dirty cliff sensors. These are located on the very bottom edge of the machine, usually tucked behind small rectangular plastic windows.
Their only job is to look straight down at the floor to prevent the robot from falling down a flight of stairs. Because they face the ground, they constantly attract static electricity, which pulls in tiny dust particles like a magnet.
First, turn the power completely off. Flip the machine upside down on a soft towel to protect the top casing. Take a dry cotton swab and gently sweep away the loose, top layer of dirt from each rectangular window.
Never press hard against these windows. Once the loose dust is gone, lightly dampen a clean cotton swab with your rubbing alcohol. Carefully rub the damp swab in small circular motions inside the sensor window.
Immediately follow up with the dry end of the swab to absorb any remaining moisture. You will be amazed at how black the cotton swab gets just from cleaning a supposedly "clean" floor sensor.
My personal realization: When I first tried to clean my vacuum, I made a terrible mistake. I used a heavily scented household glass cleaner and a rough paper towel. The paper towel left tiny white paper fibers stuck to the lens, and the soap left a heavy film. My vacuum refused to leave its dock for two days until I realized I had accidentally blinded it myself. Always stick to plain rubbing alcohol and soft microfiber.
Watch this incredible visual breakdown of how to properly wipe these delicate underside windows without causing damage.
Rescuing the Top LIDAR Navigation Turret
If you own a high-end model, you probably have a small, spinning disc on the top of the machine. This is the LIDAR (Light Detection and Ranging) turret. It is the absolute most important piece of hardware on the entire device.
This little turret spins extremely fast, mapping your entire house in real-time. Because it spins, it often acts like a tiny spool, sucking in long human hair and fine floating dust.
If this turret stops spinning smoothly, your map on your phone will look distorted, and the robot will get completely lost. Do not ever try to force the turret to spin with your fingers.
Instead, take your can of compressed air. Hold the can completely upright. If you tilt the can, you might spray freezing liquid onto the sensitive motherboard.
Point the nozzle into the small gaps around the spinning disc and use short, quick bursts of air. You will likely see a large cloud of dust fly out. If you spot a piece of long hair wrapped around the base, use a pair of precision tweezers to carefully pull it free.
Once the gap is clear, take your microfiber cloth, lightly dampen it with alcohol, and wipe the small glass laser eyes hidden inside the turret gap.
Clearing the Front Bumper Impact Sensors
The front bumper of your robot is the part that takes the most physical abuse. It physically bumps into your baseboards and furniture all day long.
Hidden behind the dark, transparent plastic strip on this bumper are the wall-following sensors. These allow the machine to drive perfectly straight alongside your walls without constantly hitting them.
Because the bumper touches everything, it collects sticky residues, especially if you have pets that rub against walls or kids who spill drinks. A simple dry wipe is never enough to remove sticky household oils.
Take your microfiber cloth and fold it into a small square. Apply a few drops of rubbing alcohol directly to the cloth, not the machine.
Firmly but carefully wipe the entire dark plastic strip on the front bumper. Pay special attention to the bottom edge, where dust tends to build up into a thick crust. You should see a highly reflective, shiny surface return once the grime is removed.
Understanding Household Mess Variations
Not all dirt is created equal, and understanding what kind of mess your house generates will help you clean your sensors better.
If you have heavily shedding pets, your main enemy is pet dander. Dander is highly oily and sticks to plastic lenses incredibly fast. You will need to clean your sensors at least once a week.
If your robot cleans an open-plan kitchen, it is fighting invisible cooking grease. When you fry food, tiny droplets of oil float in the air and settle on your floors. As the robot drives over this, the grease coats the cliff sensors, trapping dust rapidly.
For kitchen-heavy cleaners, the rubbing alcohol step is absolutely mandatory. A dry cloth will only smear the cooking grease around, making the laser distortion even worse.
If you live in a dry, sandy climate, your main issue is fine silica dust. This dust is actually very sharp and abrasive. If you rub sandy sensors with a dry cloth, you will put microscopic scratches into the plastic.
For sandy environments, always use compressed air first to blow the sharp particles away before you ever touch the lens with a cloth.
Myth vs Reality: Common Maintenance Misunderstandings
There is a lot of bad advice on the internet regarding household appliance maintenance. Let us clear up some of the most common sensor cleaning myths right now.
Myth: You can use a vacuum hose to suck the dirt out of the sensors.
Reality: A strong household vacuum hose creates massive amounts of static electricity. Touching the plastic nozzle of a large vacuum to the delicate motherboard areas of your robot can cause an electrical short circuit.
Myth: The robot will tell you exactly when the sensors need cleaning.
Reality: While some apps have a countdown timer, this is just a wild guess based on running hours. If you have a messy house, the sensors will blind completely long before the app sends you a warning notification.
Myth: You should take the plastic bumper apart to clean the inside.
Reality: Unless you are a trained technician, never unscrew the bumper. Removing screws will instantly void your expensive warranty, and reassembling the tight spring mechanisms is incredibly difficult.
The Charging Contacts: The Unsung Heroes of Navigation
Many people clean the optical sensors but completely forget about the metal charging contacts. If your robot cannot charge properly, its navigation software will act erratic as the battery desperately tries to save power.
Look at the bottom of your vacuum. You will see two shiny metal squares. Now look at the docking station. You will see two matching metal prongs.
Over time, these metal pieces build up a layer of dark oxidation and carbon buildup from the electrical transfer. When this layer gets too thick, the robot will drive onto the dock, fail to connect, and then back off again, wandering around the room confused.
To fix this, take a dry microfiber cloth and vigorously rub the metal squares on the bottom of the vacuum. If they look very black, you can use a tiny drop of alcohol.
Do the exact same thing to the prongs on the base station. A strong electrical connection is the foundation of a healthy, smart robotic brain.
By treating the charging contacts with the same respect as the optical lenses, you ensure your device wakes up with a full battery and a perfectly clear mind, ready to tackle the daily mess.
Mastering Smart Vacuum Maintenance for the Long Run
Getting your robotic vacuum to successfully complete a single cleaning cycle after a good wipe-down feels amazing. However, the real secret to automated cleaning is keeping that machine running perfectly for years. Most people treat sensor maintenance as a desperate emergency fix.
Instead, you need to turn this into a quick, proactive routine. When you regularly maintain these delicate optical lenses, you completely eliminate those annoying mid-day error notifications. You will never have to rush home to rescue a trapped machine again.
One expert strategy is to align your robot's maintenance schedule with your home's natural dust cycle. According to the United States Environmental Protection Agency (EPA) on indoor air quality, household dust accumulation varies wildly depending on your ventilation and location. If you live near a busy road, fine particulate matter will coat your vacuum's sensors much faster.
I highly recommend doing a quick visual inspection every Sunday evening. You do not have to do a deep clean every single week. Just flip the machine over, look at the plastic windows, and blow away any loose debris with your breath.
This simple weekly habit takes less than ten seconds. It guarantees your device starts Monday morning with perfectly clear vision.
Handling Extreme Pet Hair and Heavy Dander
If you share your home with furry friends, your maintenance strategy needs a massive upgrade. Pet hair is not just annoying; it is actually coated in natural body oils. When this oily hair wraps around the front spinning brush, it eventually gets pushed directly into the cliff sensors.
These natural oils create a sticky film over the infrared lasers. A dry cloth will never remove this specific type of pet grime. You must use rubbing alcohol to dissolve the oily proteins completely.
While your robotic helper handles the dirty floors, you can focus on building a stronger bond with your pets. A quiet, clean house makes it much easier to learn how to train an anxious dog without breaking their spirit because the vacuum is no longer randomly crashing into their bed.
The American Veterinary Medical Association (AVMA) explains that pet dander sheds constantly, even from short-haired animals. This means your vacuum is fighting an invisible battle every single day. Staying ahead of this dander buildup is the only way to keep the navigation software running smoothly.
Protecting Your Investment Through Consistency
Buying a premium smart home appliance is a significant financial investment. You are buying time, energy, and mental clarity. Protecting that investment requires the exact same mindset you use to protect your larger life assets.
Just like you would carefully research how to purchase your dream house with zero money down, you should respect the expensive technology running inside that house. A well-maintained robot protects your hardwood floors from scratches and keeps your expensive carpets looking brand new.
When your automated systems work flawlessly, your daily stress drops significantly. You can stop worrying about household chores and start focusing on your big career goals.
In fact, automating your home life frees up so much time that you can easily focus on starting a new business. You will have the mental energy to research the hidden legal traps that can destroy your new startup overnight. Your home should be a supportive sanctuary, not another stressful job site.
Dangerous Cleaning Habits That Will Destroy Your Device
While keeping your device clean is highly recommended, doing it the wrong way will cause permanent damage. I have seen incredibly smart people completely ruin a thousand-dollar machine in just five minutes. You must avoid these common, catastrophic mistakes at all costs.
The most common trap is using heavy liquid cleaners or dripping wet towels. People think that if a kitchen surface cleaner works on countertops, it will work on their robot. This is a fatal misunderstanding of electronics.
The plastic windows protecting the sensors are not perfectly sealed against water pressure. If you squeeze a wet sponge over the cliff sensors, liquid will slowly seep directly onto the main motherboard.
Once tap water hits those sensitive computer chips, oxidation begins immediately. According to research on electronic corrosion by the IEEE, even microscopic amounts of moisture can create an electrical short circuit. Your vacuum might work for a few days, but it will eventually die completely.
The Abrasive Paper Towel Disaster
Another massive mistake is grabbing whatever paper product is closest to you. Paper towels and cheap tissue paper feel soft to human hands, but they are incredibly abrasive on a microscopic level. They are essentially made of crushed wood pulp.
When you aggressively rub a paper towel over a plastic navigation lens, you create thousands of tiny micro-scratches. Over time, these scratches act like a frosted glass window.
The internal infrared light hits those scratches and scatters in every direction instead of bouncing straight back. The vacuum becomes permanently blind. No amount of cleaning will fix a physically scratched lens.
You must only use a high-quality, clean microfiber cloth. If you drop the microfiber cloth on the floor, do not use it on the sensors until you wash it. A dropped cloth will pick up sharp sand particles that can also scratch the plastic.
Ignoring the Hidden Omnidirectional Wheel
Most people focus entirely on the main wheels and the spinning brushes. They completely ignore the small, free-spinning caster wheel at the very front of the machine. This tiny wheel is actually the steering wheel of your entire robot.
Directly underneath this small wheel is an optical tracking sensor. The robot uses this specific sensor to measure how far it has traveled in a straight line.
If dog hair or long human hair tightly wraps around this caster wheel, the wheel stops spinning freely. It starts dragging across your floor. The tracking sensor gets confused, thinking the robot is stuck against a wall, and triggers an immediate error code.
You need to physically pull this small wheel out of its socket every few weeks. Wipe the metal axle clean and use a cotton swab to clean the small tracking hole beneath it.
Leaving the Charging Station in a Messy Zone
Your cleaning efforts are completely wasted if you ignore the base station. The dock is the home base, and it has its own set of infrared beacons that guide the robot back to charge.
If the plastic cover on the charging dock is covered in dust, the vacuum cannot see the homing signal. It will wander around the room like a lost puppy until the battery completely dies in a random corner.
Keep the dock in a clear, highly visible area. Avoid placing it in direct, intense sunlight. Bright UV rays from the sun can actually blind the infrared sensors, making it impossible for the robot to dock during the daytime.
When you have a reliable, fully functioning smart home, you can confidently leave the house for long periods. You can easily plan that dream vacation and research how to buy the best travel insurance for pre-existing conditions without worrying about returning to a dusty, messy house.
Taking control of your own home maintenance gives you immense confidence. Just like you would question the truth about employer-sponsored insurance to protect your family, you should question default factory settings to protect your smart home investments.
Common Questions About Fixing Smart Vacuum Navigation
Why does my robot vacuum keep going over the same spot?
This usually happens because the front bumper sensors are smeared with sticky oils. The machine thinks it is constantly hitting an invisible wall, causing it to bounce back and forth repeatedly. A quick wipe with rubbing alcohol usually fixes this instantly.
Can I use glass cleaner to clean the bottom sensors?
No, you should never use household glass cleaners. These chemicals contain heavy soaps and ammonia that leave a cloudy, sticky film on the plastic lenses. Always stick to high-grade isopropyl alcohol and a soft microfiber cloth.
How often should I realistically wipe down the navigation lenses?
If you have a pet that sheds heavily, you should wipe the sensors once a week. For a normal household without pets, checking them every two to three weeks is usually perfectly fine.
What should I do if my vacuum still spins in circles after cleaning?
If the sensors are completely clean and it still spins, lightly tap the front bumper a few times. Sometimes, a small piece of hard debris gets jammed behind the bumper, keeping the physical impact switch permanently pressed down.
Is it safe to use compressed air on my smart cleaner?
Yes, but you must hold the can perfectly upright. If you tilt the can, you risk spraying freezing liquid propellant directly onto the delicate motherboards, which can destroy the internal computer.
Your Action Plan for Flawless Automated Cleaning
You now possess the exact knowledge needed to keep your smart vacuum running like it just came out of the box. You understand the science behind those invisible light beams and exactly how household dust destroys their accuracy. More importantly, you know exactly which dangerous cleaning habits to avoid.
You no longer have to feel frustrated or helpless when your device starts acting confused. Instead of hiding the vacuum in a closet, you can easily diagnose the problem in minutes. This simple maintenance routine will save you hundreds of dollars in unnecessary repair bills.
I challenge you to grab a microfiber cloth and some rubbing alcohol today. Spend just five minutes giving your hard-working robotic helper the deep clean it truly deserves. I know exactly how incredible it feels to finally sit on the couch and watch my vacuum clean the entire house without a single error. You absolutely deserve that exact same level of peace, comfort, and spotless floors!
Disclaimer: The information provided in this blog post is for educational and general informational purposes only. Always refer to your specific manufacturer's user manual and warranty guidelines before performing any maintenance or cleaning on your electronic devices. We are not responsible for any accidental damage caused by improper cleaning methods.